Welcome to Dyn’s Email Delivery Getting Started Guide!
Logging In
To login to Email Delivery, you will need to create a DynID, if you don’t already have one. You should also consider adding 2-factor authentication for added security.
Add Email Delivery to an existing DynID
Overview of Email Delivery Basic Setup
| 1. Create one or more Approved Senders. These are the email addresses that will appear in the ‘From’ line of the email. |  |
| 2. Set your DNS manager to include DKIM and SPF authorization credentials for your Authorized Sender account(s). |  |
3. Set up and test your SMTP connection using an SMTP library or product such as Postfix or SendMail to send email through Dyn.
|
Warning: Email Delivery does not support sending via hard-coded IPs addresses. You will need to send using
smtp.email.dynect.net or your custom CNAME URL.Note: Messages will be refused if sent to smtp.email.dynect.net and total message size is greater than 2MB.
|
| 4. Send email. |
Note: If an SMTP connection to Dyn’s email servers is idle or paused for more than 10 seconds (no emails being sent), the connection will be closed. A new connection to Dyn’s servers will need to be established to continue sending.
Note: It is strongly advised to send multiple messages per open SMTP connection if you intend to send at high volume.
|
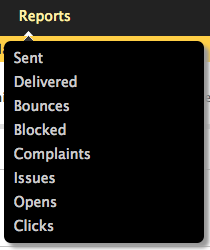
| 5. Analyze reports to get a view of sent email, bounces, spam complaints, and opens. |  |
Advanced Features To Enhance Your Experience
- Turn on tracking for Opens and Clicks to see these items in your reports.
- Create the postback handlers that will process the bounce and spam complaint notifications.
- Create Custom X-Headers for variables, unique identifiers, or anything else you want to use for tracking Email results.
- Create a List-Unsubscribe header to use in addition to the unsubscribe link you include in the body of your Email.
- If you’re looking to manage your Email programmatically, see our Email API information.
Important Things to Note
Each email you wish to send through Email Delivery requires the same credentials you already have set up in the Control Panel.
If you have any user-defined variables you wish to include with your emails, specify them as custom headers in email. Email Delivery provides four user-defined variables to allow the sending of data. Email Delivery, upon receiving each email, parses the originator, the recipient, the subject, content and other email headers, and submits the message to the appropriate queue for delivery. When extracting the message body, we look for both “plain” messages and multipart (MIME) email.
The only reason a message would not be submitted to the queue for sending is if the recipient is on the suppression list, meaning they had previously hard-bounced or had submitted a spam complaint against the same sender email address.
Ramping Your Email the Right Way
As a new customer, it is important to bring on bulk/marketing email slowly and not large surges all at once. Mailbox providers need to get used to receiving your email off of new IP addresses. This must be done strategically.
For help with a ramp plan, contact our support team with your anticipated monthly volume and any particular timeframes in which you’d like to get the volume ramped onto us. We’ll provide you with a specific plan on how to ramp properly.
Identifying Parts of the Interface
These two pages outline all of the interface objects and views.
| Email Dashboard | The Dashboard is the first view listed on the far left of the menu bar. |
| Email Delivery Control Panel | The black menu bar at the top of each view. Used to navigate around the Email Delivery product. |
What do you want to know?
Each of these topics relates to a specific view in the Email Delivery portal. Select a topic to see more information about the page and its content.
Approved Senders |
Add or review approved senders, email addresses allowed to send emails through your email delivery account. |
Reports |
View and understand the various data fields on each report. |
Email Integration |
The Integration view covers (1) Email API Key Generation, (2) Postback URLs, and (3) Custom X-Headers. |
Email Accounts |
Where the Master account can review the sub-accounts on your email delivery account. |
Sub-Accounts |
Add sub-accounts to increase flexibility and security on your email delivery account. |
RepCheck |
Review your email reputation based on your last 30 days of activity. |
IP Manager |
Determine which accounts share an IP address and which accounts have a dedicated IP address. |
Suppression List |
Maintain your sending reputation by reviewing the list of suppressed email addresses. |
