Zone data can downloaded programmatically from your Managed DNS account using BIND's DIG tool.
Note: DIG is native to OSX and Linux systems, and can be accessed via Terminal. Windows users must download BIND to use the DIG tool.
DIG uses the AXFR Response to retrieve your zone information. Learn more about the AXFR Response.
| Additional Resources | |
| Using External Nameservers | Zone Transfer Issues |
| Creating a Secondary Zone | Modify a Secondary Zone |
Allow zone data to be downloaded via DIG for a specific domain
| 1. You will need the public IP address of the server or PC where you intend to use DIG.Go to checkIP.dyn.com to identify your IP address. |  | |
| 2. Log into your Managed DNS account and click the Manage button beside the zone you would like to download. |  | |
| 3. Click the Zone Options tab. |  | |
| 4. Select the Custom External Servers option and paste in your IP address into the Host 1 field. Note: Additional servers can be added by clicking the "+" beside the Host 1 field. | 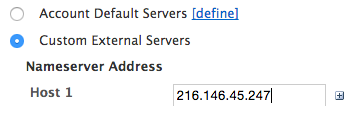 | |
| 5. Click Save Settings. |  | |
6. Open Terminal or BIND and enter this command, replacing "yourdomain.com" with your domain:dig AXFR yourdomain.com @xfrout1.dynect.netThe dig command will return the zone data in a text format.Note: The Primary transfer host is xfrout1.dynect.net to send AXFR requests to. The Alternate host xfrout2.dynect.net is an offline secondary source. | ||
Allow zone data to be downloaded via DIG for all of your domains
| 1. You will need the public IP address of the server or PC where you intend to use DIG.Go to dyn.checkIP.com to identify your IP address. | |
| 2. Log into your Managed DNS account Overview page and click the Edit button beside the External Nameservers under your Customer Account Info. | 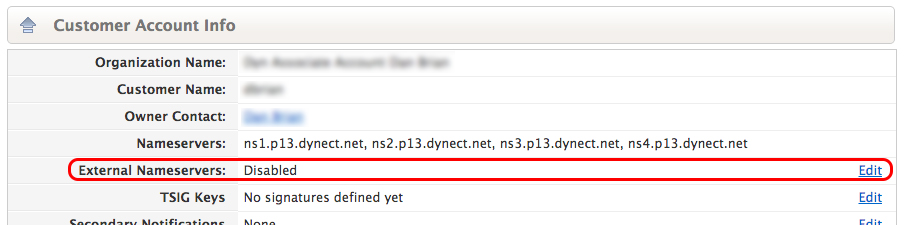 |
| 3.Under Service Defaults, select Defaults Enabled and enter your IP address in the Host 1 field. Note: Additional servers can be added by clicking the "+" beside the Host 1 field. | |
| 4. Click Save Defaults. | 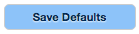 |
5. Open Terminal or BIND and enter this command, replacing "yourdomain.com" with your domain:dig AXFR yourdomain.com @xfrout1.dynect.netThe dig command will return the zone data in a text format.Note: The Primary transfer host is xfrout1.dynect.net to send AXFR requests to. The Alternate host xfrout2.dynect.net is an offline secondary source. | |