Dyn’s Traffic Director has a wide range of uses, from geographic load balancing to filtering traffic to DDOS scrubbing services. One of the more popular uses for Traffic Director is to direct incoming email to your nearest email server, complete with failover chains that can safeguard your mail infrastructure from becoming unresponsive.
EXAMPLE: If you have email servers in Los Angeles and New York, Traffic Director can ensure that emails being sent to your business from the western United States are received by your Los Angeles server, and emails being sent from the eastern United States are received by your New York mail server. Additionally, you can setup a failover chain so that if your Los Angeles server goes down, you can automatically have the mail redirected to your New York server, and vice versa.
In this article, we are going to setup two Response Pools, and their corresponding Rulesets, with Traffic Director to do exactly this.
NOTE: Total number of records in a single Response Pool may not be more than 255.
| 1. Log into your Dyn Managed DNS account. | |
| 2. Click Manage beside the zone you wish to add the Traffic Director service. | |
| 3. Select Traffic Director from the Add a New Service drop-down menu. |  |
| 4. Enter a label. This will help you identify this specific instance of Traffic Director in your zone. |  |
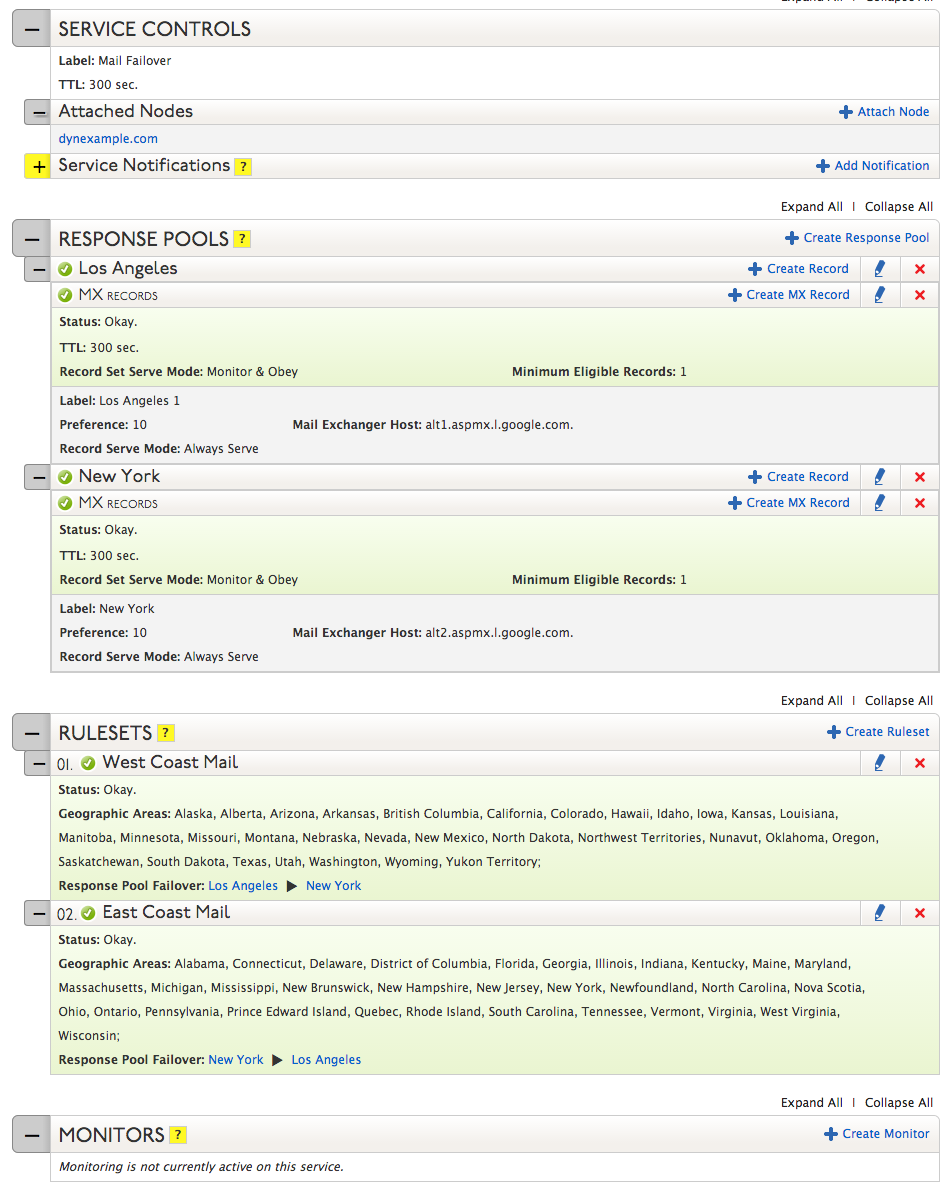
| 5. Under Service Controls, you can alter the default Time To Live (TTL) for this instance of Traffic Director or edit the label you created in the prior step.
Additionally, you can attach more nodes (zones or cut zones) to this specific instance of Traffic Director and be alerted of any changes to this configuration by adding a notifier in the Service Notifications section.
|
 |
| 6. Two Response Pools will need to be created to serve the records for your Los Angeles and New York servers.
Click Create Response Pool and enter a label (Los Angeles).
|
|
| 7. Click Create Record under your newly created Response Pool and then select MX from the drop-down menu.
Add a new label that will identify the first mail server (Los Angeles) and then add your mail server’s address to the Mail Exchanger Host field.
NOTE: If you have multiple servers in the same geographic location, you can add them to their respective Response Pools by creating more records in that Response Pool. |
 |
| 8. Repeat this steps 6 and 7 to create a Response Pool for the New York mail server. | |
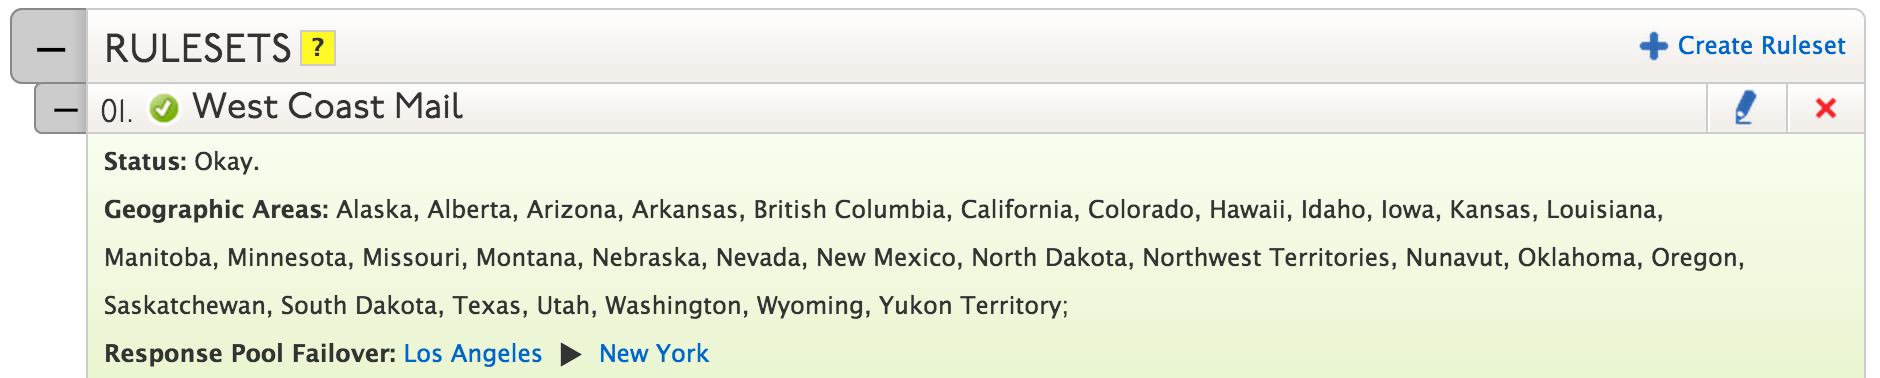
| 9. Rulesets define which Response Pools will respond when a DNS inquiry is made from a specific geographic locations.
Under Rulesets, click Create Rule Set. Enter a label for the first rule, “West Coast Mail”. In the Geographic Areas field, select the geographic regions you would like the Response Pool to serve. We will be using “N. America West” in the Quick-Add Region section. Beside Response Pool Failover, select your primary Response Pool (Los Angeles) from the drop-down menu. A new drop-down menu will appear beside the Response Pool you just set. If needed, you can set a failover Response Pool (New York) in the second drop-down menu in the case that your primary pool goes down. This is called a Failover Chain.
|
 |
10. Repeat step 9 and create a Ruleset called “East Coast Mail” with the Geographic Areas field set to “N. America East” and the Response Pool Failover to New York. |
| 11. If desired, you can setup a probe that will monitor the responsiveness of your node and will notify you if one of your nodes goes down.
Beside Monitors, click Create Monitor. Select a monitoring protocol (HTTP, HTTPS, PING, SMTP, or TCP), set the Probe Interval to the desired length of time between probes, the number of Retries before the probe officially considers the server down, and the fill out out the following fields as needed. Then select a Notifier from the Monitor Notifiers drop-down menu.
|
 |
| 12. Once all conditions have been set and saved, click Publish. | |
Configuration Overview