Note: The new zone management interface is currently only available to certain customers.
Dyn’s new zone management interface allows you to easily navigate your zones and control your records. Follow the steps below to learn how to add zones and manage records within the new user interface (UI).
You can switch between the beta UI and the current UI by using the toggle switch at the top of the screen. Using the toggle switch will not interrupt your session.

Add A Zone
| 1. From the Zones tab, click Add Zone. |
 |
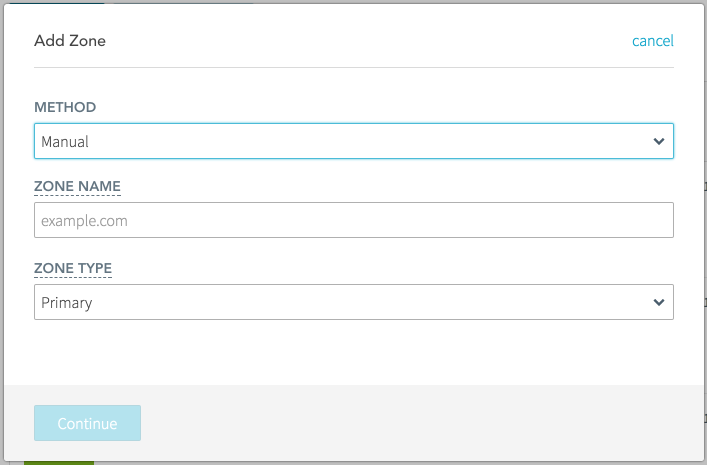
| 2. Enter the hostname of a zone you want to create in the Zone Name field, then click Continue. The zone will be created and automatically published with the necessary SOA and NS records.
|
 |
Import A Zone
| 1. From the Zones tab, click Add Zone. |
 |
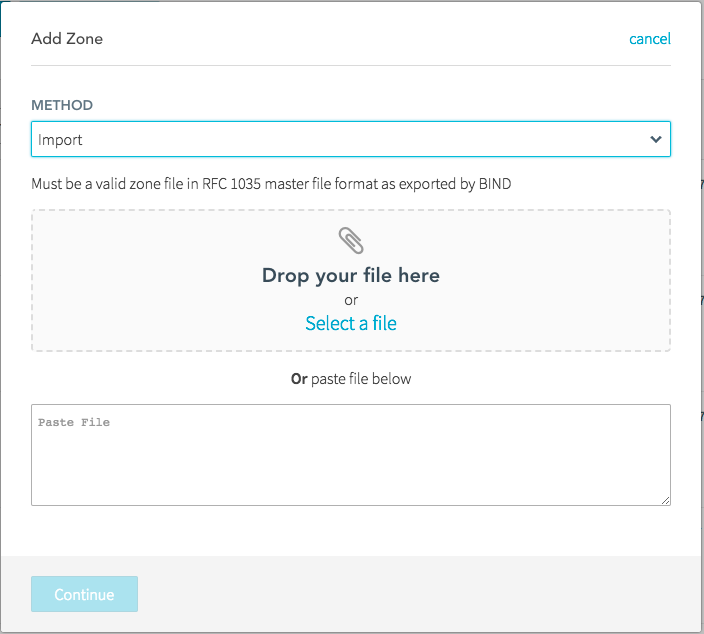
| 2. Select Import from the Method drop-down menu. |
|
| 3. Drag and drop, select, or paste a valid zone file into the Import Zone File window. The zone will be imported and automatically published. |
 |
Transfer A Zone To Dyn
Follow these instructions to transfer your zone from another DNS provider via an AXFR transfer.
| 1. From the Zones tab, click Add Zone. |
 |
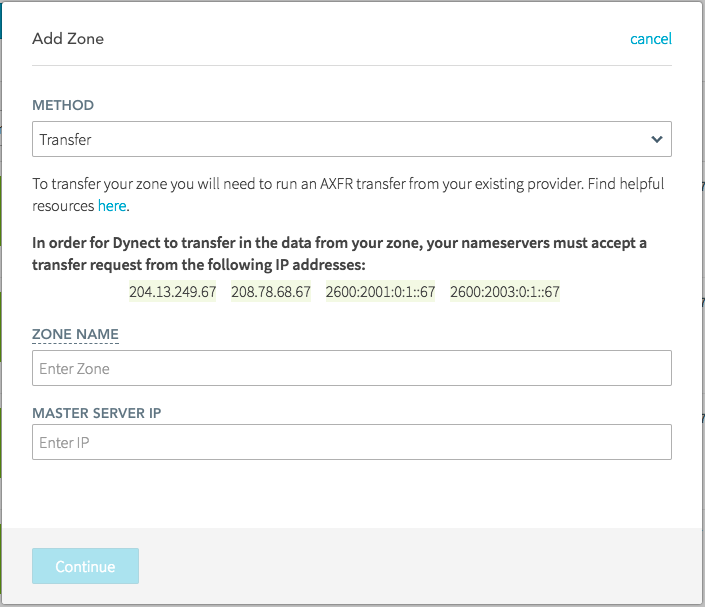
| 2. Select Transfer from the Method drop-down menu and then type in your zone’s name and the IP address of your DNS provider’s master server.
Note: You will need to whitelist the following IP addresses with your DNS provider to allow the transfer of your zone:
204.13.249.67
208.78.68.67
2600:2001:0:1::67
2600:2003:0:1::67
|
 |
| 3. Click Continue and your zone will begin to transfer. To check the status of your transfer, select your zone from the Zones tab.
Once your zone has been transferred, it will automatically be published to Dyn’s servers.
Note: You will not be able to manage or add records to your zone during the transfer process.
|
|
Add A Record To A Zone
| 1. From the Zones tab, click the the Actions icon (…) for the zone where you want to add a record. Use the Sort By list to sort zones names alphanumerically in ascending or descending order. |
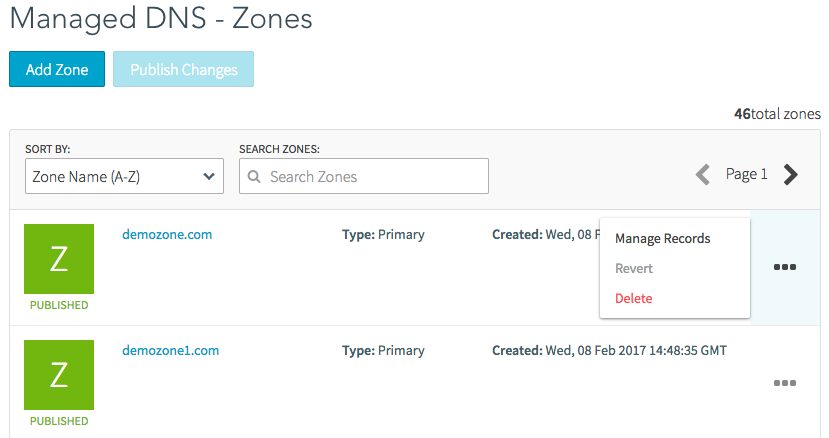 |
| 2. Click Manage Records. |
|
| 3. Click Add Record. |
 |
| 4. In the Add Record dialog, select the type of record from the drop-down list, and then enter the information for the record. For more information about record types, see Zone Records. |
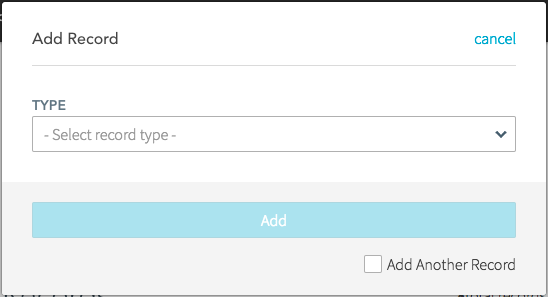 |
| 5. Click Add. Click the Add Another Record checkbox to add multiple records in succession. |
|
| 6. Once your records have been added, click Publish Changes. |
|
Update A Record
| 1. From the Zones tab, click the Actions icon (…) for the zone where you want to update a record. Use the Sort By list to sort zones names alphanumerically in ascending or descending order. |
 |
| 2. Click Manage Records. A list of records for the zone is displayed. |
|
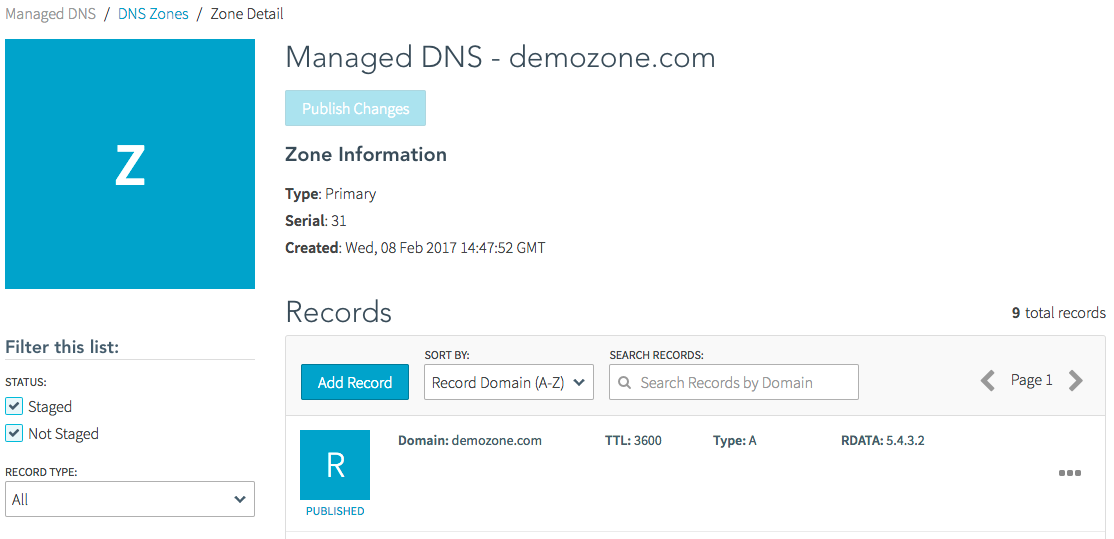
3. To quickly find a record, use the following filter options:
- Enter the name of the record in the Search Records field.
- Select the Staged check box to find unpublished records.
- Select the Not Staged check box to find published records.
- Select the record type from the Record Type drop-down list.
|
 |
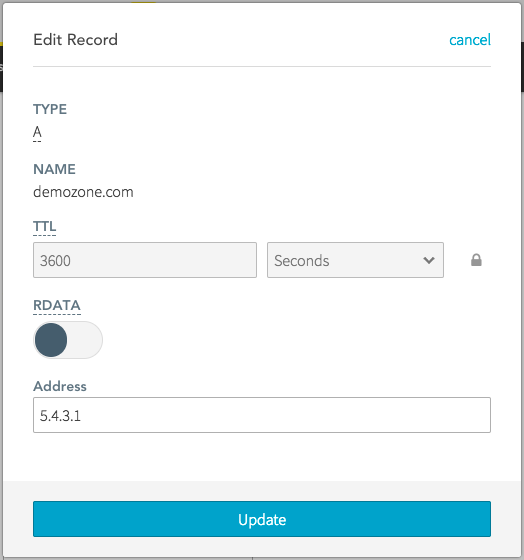
| 4. Click the Actions icon (…) for the record you want to update and select Edit. |
 |
| 5. Make changes to the record as needed, then click Update. |
 |
| 6. Click Publish Changes. |
|
Delete A Record
| 1. From the Zones tab, click the Actions icon (…) for the zone where you want to update a record. Use the Sort By list to sort zones names alphanumerically in ascending or descending order. |

|
| 2. Click Manage Records. A list of records for the zone is displayed. |
|
| 3. Click the Actions icon (…) for the record you wish to delete, and then click Delete. |
 |
| 4. When the confirmation message appears, click Delete Record. |
|
| 5. Click Publish Changes.
|
|


