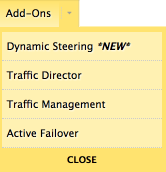
Dyn’s Advanced Traffic Management products, including Traffic Director, provide the ability to control DNS responses on a granular/customized geographical ruleset. Part of the rulesets will be the identification of the global regions, countries, or states and provinces that use a specific DNS server group.
You can reference this video on how to set up Traffic Director or follow the direction below.
For a list of the granular/customized geographical rule set options, see Predefined Geographic Groups.
In order for monitoring to occur on your account, please make sure the IP addresses included here (https://manage.dynect.net/help/agents.html) can reach all your network endpoints. The web page requires you to log on to Dyn’s Managed DNS.
Click one of the following links for instructions on adding/removing/configuring Traffic Director on your account.
Adding Traffic Director
| 1. Click Overview or Manage DNS. | |
| 2. Click Manage in the far right column for the zone you want to change. | |
| 3. Click Simple Editor on the menu bar. | |
| 4. Click the Records tab. | |
| 5. Scroll to the Services heading. | |
| 6. Select Traffic Director from the Add a New Service drop-down list to add a Traffic Director service to this zone. |  |
| 7. Select an existing Traffic Director Service from the list.
— OR — Proceed to step 8 to create a new Traffic Director Service. |
 |
| 8. Scroll to the bottom of the screen to find Create a new Traffic Director Service. |  |
| 9. Enter a Label for the service.
Note: The following special characters are not allowed in the Traffic Director Service
Label field: * < > % /Note: A Traffic Director Service
Label may not start with a special character (Example: .special_td). |
|
| 10. Click the Link Service button if you chose an existing Traffic Director in step 7. — OR —Click the Create Service button if you chose to create a new Traffic Director service. |
|
| 11. Configure Traffic Director. | Click Manage and Configure Traffic Director to access the instructions for configuring Traffic Director. |


