Create and manage TSIG Keys for either primary or secondary zones in Managed DNS to increase your DNS security. Use these instructions to set up TSIG keys. Managed DNS supports HMAC-MD5, HMAC-SHA1, HMAC-SHA224, HMAC-SHA256, HMAC-SHA384, and HMAC-SHA512.
| TSIG Keys can be created for both Primary and Secondary zones using these instructions.
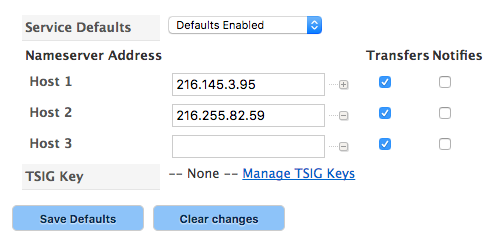
1a. For a primary zone, open the zone in the Simple Editor and select the Zone Options tab. TSIG Key field is on the General tab. — OR — |
 |
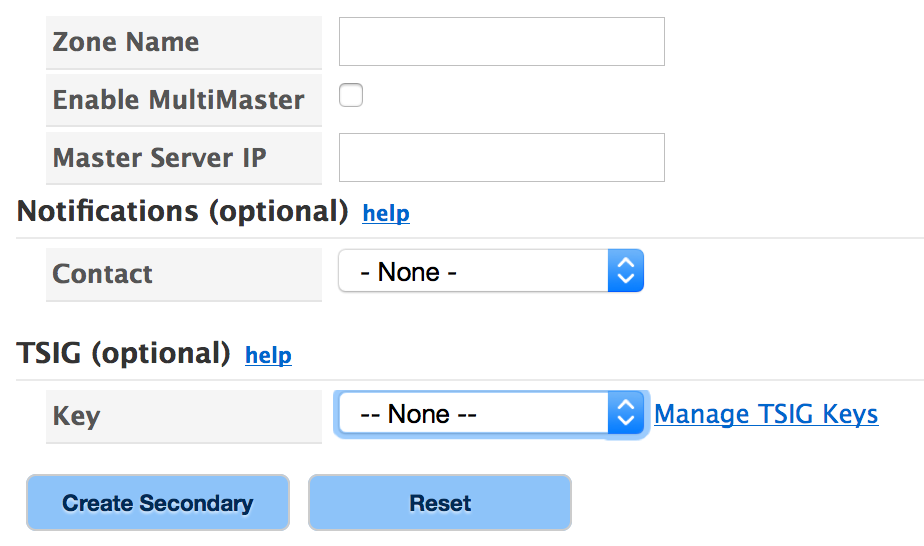
| 1b. For a secondary zone, the TSIG Key field is on the Create a Secondary Zone page.
If the secondary zone is already created, the field is on the Simple Editor tab of the zone.
|
 |
| 2. Click Manage TSIG Keys to create or alter the keys. | |
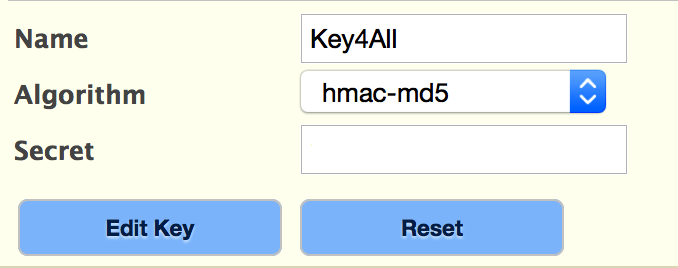
| 3. Enter the TSIG Key Name, select the Algorithm from the drop-down list, and enter the Secret. The name will appear in the drop-down list for selecting a TSIG key. The secret is the password for this key.
The secret will be generated using your system’s signing tools and encrypted with the selected algorithm. NOTE: The Name and Secret values must match the TSIG name on your system. |
|
| 4. Select Save new key to add the key to the TSIG list. | |
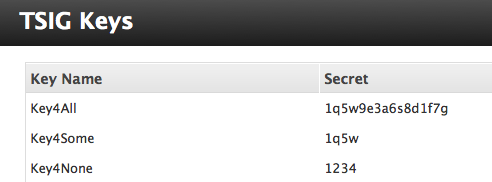
| 5. A listing of all TSIG Keys and each Secret is kept on the TSIG Keys view. |  |
| 6. To Edit, Reset, or Delete a TSIG Key, use the arrow on the right side of the table to expand the TSIG Key information. | |
| 7. Enter changes into the Name or Secret field(s).
Select Edit Key to save your changes. Reset removes your changes and keeps the old information. Delete Key removes the entire key from the list. NOTE: The Name field here must match the TSIG Name on your system. |
|
| 8. Created keys will now appear in the drop-down list next to the Key field. | |

