Watch this video or follow the instructions below to learn how to install and set up the Dyn Dynamic DNS Update Client.
Before you begin, you will need to:
Download the Dyn Update Client for Windows
Installation and Configuration
Note: Before installing the Dyn Updater, make sure ALL previous dynamic DNS update clients have been uninstalled from your computer.
| 1. In your Dynamic DNS account, go to Account Settings and locate your Updater Client Key. If the Updater Client Key field is blank, click Generate Key. Note: Generating a new Updater Key will override the password on any other existing DDNS update clients attached to your account. This means that you will have to distribute the new key to any existing update client linked to your Dynamic DNS account. Note: If you are setting up DDNS for Managed DNS, visit our Managed DDNS guide. | 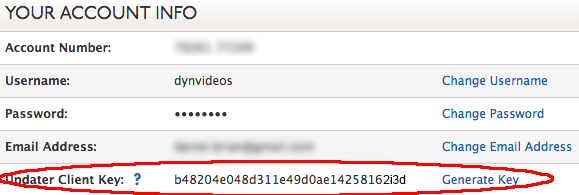 |
| 2. Locate the file DynUpSetup.exe on your computer and double click the icon to run it. Note: If you're not logged in as an administrator, you may need to right-click DynUpSetup.exe, and then select Run as administrator. | 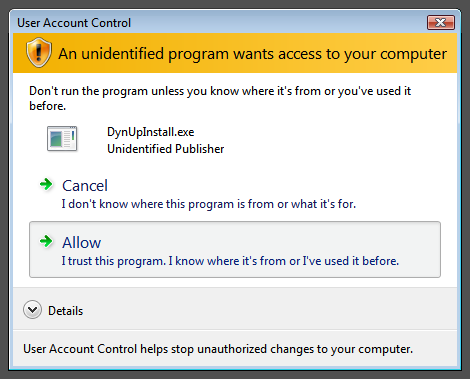 |
| 3. Open the Dyn Update Client and enter your Dyn account username and use the Updater Client Key as your password. If entered correctly, the Dynamic DNS Hosts field will populate with your hosts. | 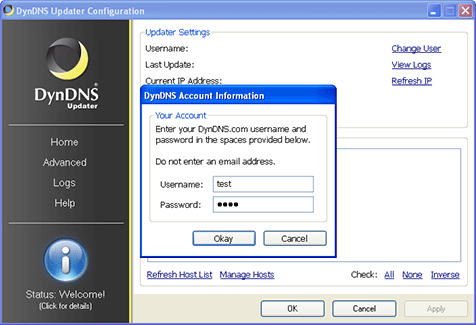 |
| 4. Click the check boxes beside the hosts you would like updated by the client, and then click Apply. The Update Client will automatically begin to update your hosts with your current IP address. | 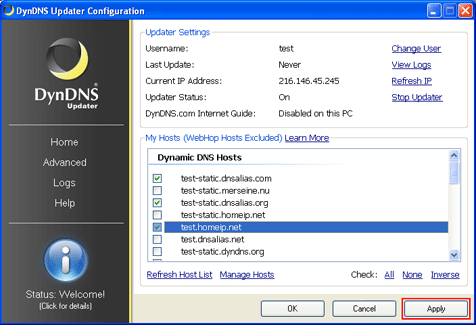 |
| 5. If the status icon displays a check mark indicating that the service is working, click OK to exit the Updater. The Updater will continue to run in the background and update your hosts when your dynamic IP address changes. | 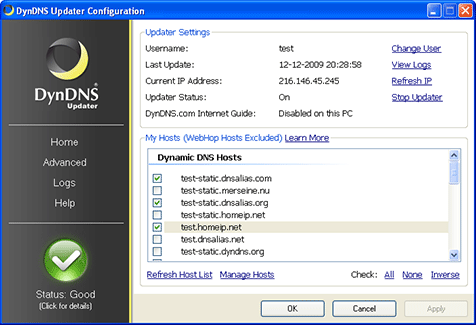 |
General Use
Open Current Configuration
| You can open the Dyn Updater by double clicking the Dyn icon in your system notification tray. Double clicking the icon will load the Configuration tool. You can also right-click the icon for more commands. You may also access the Dyn Updater Configuration tool from the Windows Start Menu. | 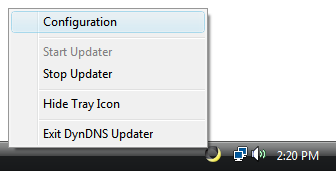 |
Status
Green - (Normal) Your hosts are up-to-date. Orange - (Warning) The Dyn Updater requires your attention. Common reasons for receiving a Warning message include:
- The Updater has submitted the same IP address multiple times within a period of 2 days. To reduce load, Dyn requests that you only update your hostnames if their IP addresses change. If you see multiple Warning messages in your Logs, you should determine the problem immediately, otherwise your account may be blocked due to abuse.
- Running multiple update clients on one computer, such as version 3.0 and version 4.0 simultaneously.
- Running multiple update clients on the same network, such as dynamic DNS software on your router, and an update client on your computer.
- Fresh installation of the Dyn Updater, where all your hosts were already up-to-date.
Red - (Critical) The Dyn Updater has received an unrecoverable error. Some causes for a Critical status are:
- Invalid account information (username or password is incorrect).
- Invalid query sent to Dyn, check your internet connection to make sure data is being transmitted correctly.
- Your account has been blocked due to abuse.
Once you have corrected the source of the critical error, you may click View Details followed by Retry update to reset the Updater.