Delegating your zone enables queries to be properly informed of the Authoritative nameservers’ location.
| 1. Click Overview. | |
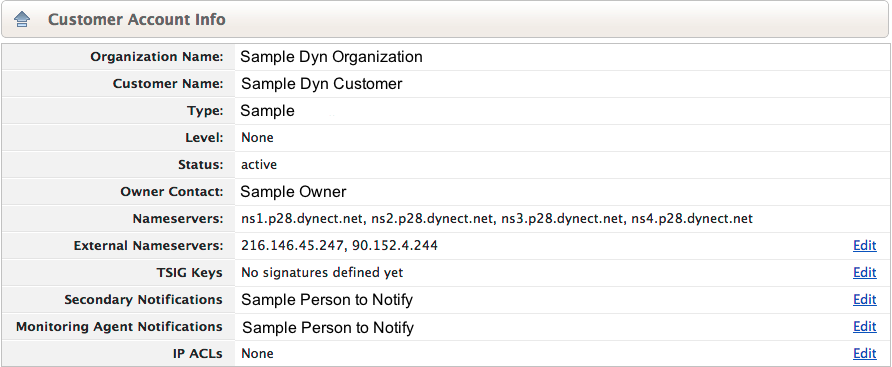
| 2. Click Customer Account Info to access the information. |  |
| 3. Copy the four Nameservers.
NOTE: It is very important to add NS records for all 4 nameservers at your domain’s registrar. |
|
| 4. Log in to your domain registrar’s self-service portal and add (append) an NS record for each Nameserver in your domain. Here is a list of popular registrars and instructions on how to delegate your domain through their web portals:
Dyn NOTE: In most cases, logging onto a self-service portal is sufficient to make changes at your domain registrar. If this is not your situation, contact the registrar directly and determine the best way to get this information to them. For Reverse DNS Zones, contact your ISP or the assigning authority for your IP address block(s) and ask them to append the NS records. |
|
| 5. Wait 72 hours before changing or deleting your previous DNS service. During this time, queries may be answered by either service. Any discrepancies between the two zones could cause unexpected results for your end users. | IMPORTANT NOTE: While most delegation changes are refreshed on the TLDs within 15 minutes after the delegation change, it may take longer for individual country code TLDs to refresh their delegation cache. Check with your domain registrar if you have questions about delegation cache refresh rates. |
| 6. You can check the DNS resolution for your domain by entering your domain name in the ‘Name’ field here and pressing Enter.
You should see our dynect.net name servers listed in blue. You may also use the command line tools, DIG and WHOIS, to check your DNS resolution.
See How to use BIND’s DIG Tool for more information. |
|
