Managing Zone Contacts
Create a contact to be able to notify a person via email or log entry when a notification event occurs on your Dyn Managed DNS account.
To Create a Contact
| There are 2 ways to access the Manage Contacts view within the Dyn Managed DNS portal. |
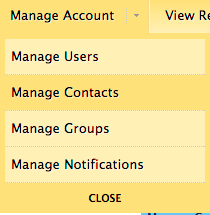
| 1. The first way is to click Manage Account, and then click Manage Contacts within the Manage Account view. |


|
| 2. The second way to access the Manage Contacts view is to select Manage Contacts from the drop-down menu by selecting the arrow to the right of Manage Account on the menu bar. |
 |
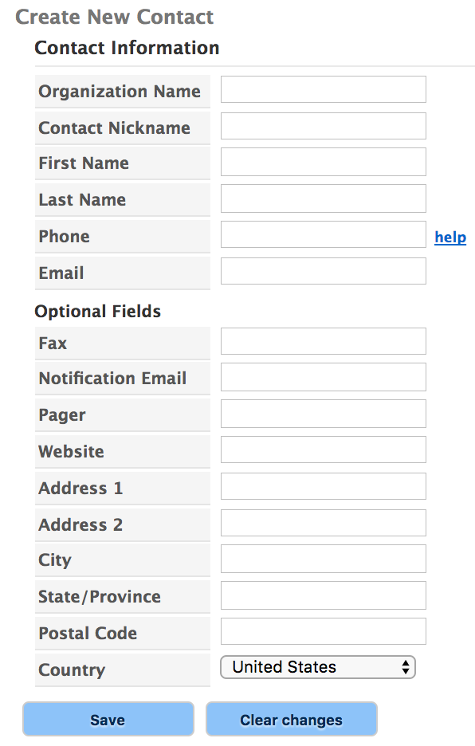
| 3. Once you are on the Manage Contacts view, click Create Contact to open the Create Contact form. |
 |
| 4. Use the following information to assist you in completing the Create New Contact form:
Contact Information (required)
Organization Name: Editable field that is auto-populated with the owner contact name.
Contact Nickname: Enter a nickname for this contact. It can be their first name, or another format to identify contacts.
First Name: Enter the first name of the contact.
Last Name: Enter the last name of the contact.
Phone: Enter a phone number for this contact. It will only be used for authorized communication with the contact.
Email: Enter an email account for this contact. It will only be used for authorized communication with the contact.
Optional Fields
Click for More Info
Fax: Enter a fax number for the contact. (optional)
Notification Email: Enter an email address for the contact where notifications (if applicable) should be sent. (optional)
Pager: Enter a pager number for the contact. (optional)
Website: Enter a website for the contact. (optional)
Address 1: Enter the first address line for the contact. (optional)
Address 2: Enter a second address line for the contact. (optional)
City: Enter the city for the contact’s address. (optional)
State/Province: Enter the contact’s state or province. (optional)
Postal Code: Enter the postal code for the contact’s address. (optional)
Country: Select the contact’s country from the drop-down list. (optional)
|
 |
| 5. Click Save to add the contact or click Clear Changes to clear the form. |
 |
<< DNS Knowledge Base