“dig” is a robust command-line tool developed by BIND for querying DNS nameservers. It can identify IP address records, record the query route as it obtains answers from an authoritative nameserver, diagnose other DNS problems.
NOTE: Windows users can download the tool from BIND’s website. Use Terminal to access dig on Linux and Macintosh systems.
Accessing dig (Mac)
| 1. From your Applications folder, open the Utilities folder and select Terminal. | |
| 2. When Terminal is open, type in any of the commands listed below using a hostname you wish to look up. |
Install dig (Windows)
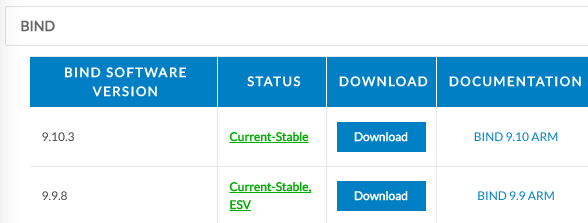
| 1. Go to BIND’s website and download the most current, stable version of BIND.
NOTE: BIND supports both 32 and 64 bit Windows systems. Confirm which version of Windows you are using and download the correct version of BIND. View Microsoft’s documentation to determine which version of Windows you are using. |
 |
| 2. Extract the downloaded file and install BIND in the following directory: C:\Program Files\ISC BIND 9. Check the box beside Tools Only. | 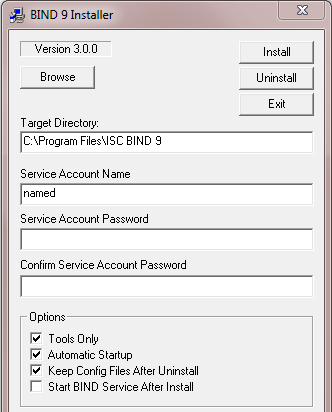 |
| 3. Once BIND is installed, click on the Windows menu and open the Control Panel, then open System Properties. | 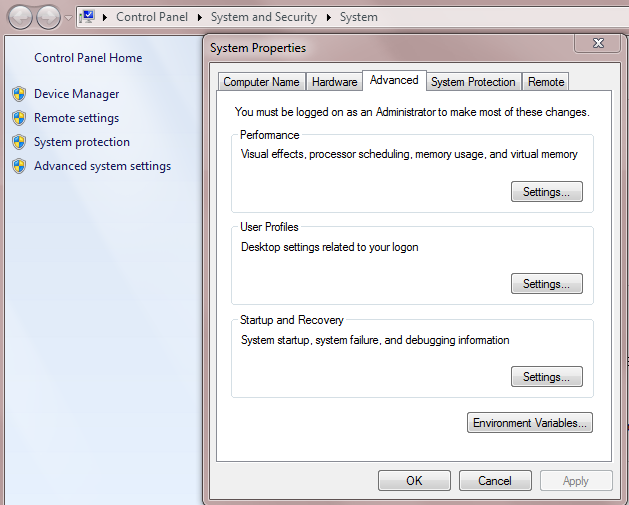 |
| 4. On the Advanced tab, click Environment Variables. Under System Variables, select Path and then click Edit. | 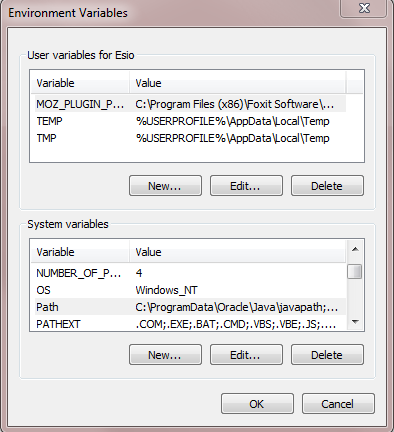 |
| 5. Scroll to the end of the path in the Edit System Variable window and add “C:\Program Files\ISC BIND 9\bin” to the end of the path. Then click OK. | 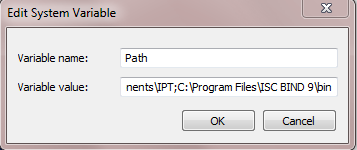 |
| 6. Click OK in the Edit Variables window and click OK in the System Properties window. | |
7. Access dig by opening the Command Prompt.
|
|
 |
|||||||
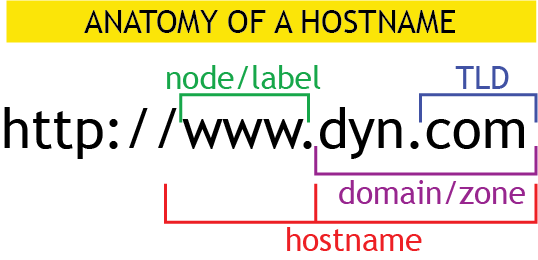
| Before using BIND’s dig tool, it is important to understand the components of a hostname.
In the diagram above, dyn.com is a domain root and a hostname with a specific set of records attached to it. www.dyn.com is a domain with a label or node added to the front of it, and constitutes as a different hostname with a separate set of records than dyn.com. Another example of a hostname with a node would be help.dyn.com. |
|||||||
How to use dig
|
Understanding the Results
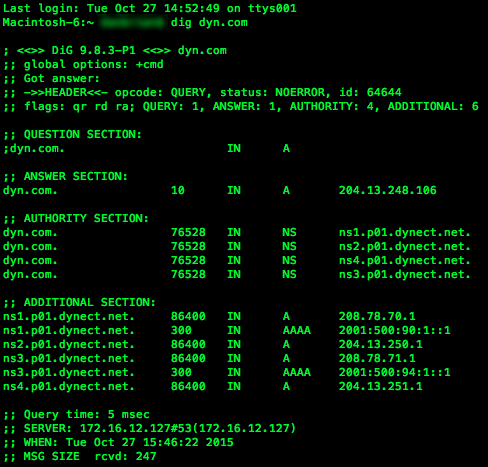
QUESTION SECTION: The query made to the DNS. In this example, we asked for the first available A record for the hostname, dyn.com.
ANSWER SECTION: The first available answer for the query made to the DNS. In this example, we received the A record for the IP address 204.13.248.106.
AUTHORITY SECTION: The authoritative nameservers from which the answer to the query was received. These nameservers house the zones for a domain.
ADDITIONAL SECTION: Additional information the resolver may need but not the answer to the query.
dig Commands
| COMMAND | DESCRIPTION | EXAMPLE |
dig [hostname] |
Returns any A record found within the queried hostname’s zone. | dig dyn.com |
dig [hostname] [record type] |
Returns the records of that type found within the queried hostname’s zone. List of Record Types. | dig dyn.com MX |
dig [hostname] +short |
Provides a terse answer, usually just an IP address. | dig dyn.com +short |
dig @[nameserver address] [hostname] |
Queries the nameserver directly instead of your ISP’s resolver. | dig @ns2.p01.dynect.net dyn.com |
dig [hostname] +trace |
Adding +trace instructs dig to resolve the query from the root nameserver downwards and to report the results from each query step. |
dig dyn.com +trace |
dig -X [IP address] |
Reverse lookup for IP addresses. | dig -X 204.13.248.106 |
dig [hostname] any |
Returns all records for a hostname. | dig dyn.com any |