Dyn Standard DNS provides two separate interfaces for managing DNS records: the Standard interface, which provides support for basic record types such as A, CNAME, MX, and TXT records, and the Expert interface, which includes support for additional record types such as PTR, NS, SRV, and more.
- Back to Resource Records
- Deleting records in the Standard Interface
- Deleting records in the Expert Interface
Switching Interfaces
You can switch between the Standard and Expert interfaces at any time using the Preferences button in the upper right of the page when viewing a Dyn Standard DNS zone. This setting is stored on a per zone basis, so some zones can be in the Standard interface and others can be in the Expert interface. No data is lost when switching between interfaces, but you cannot add, modify, or delete records other than A, CNAME, MX and TXT in the Standard interface.
Deleting records in the Standard Interface
| 1. Log into your Dyn account and find the My Services option. | 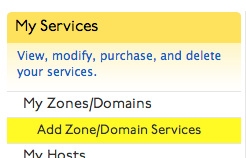 |
| 2. Find the Zone you wish to remove a record from and click Dyn Standard DNS Service to the right of the zone's name. | 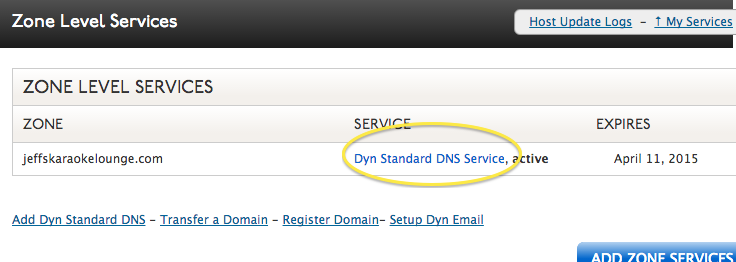 |
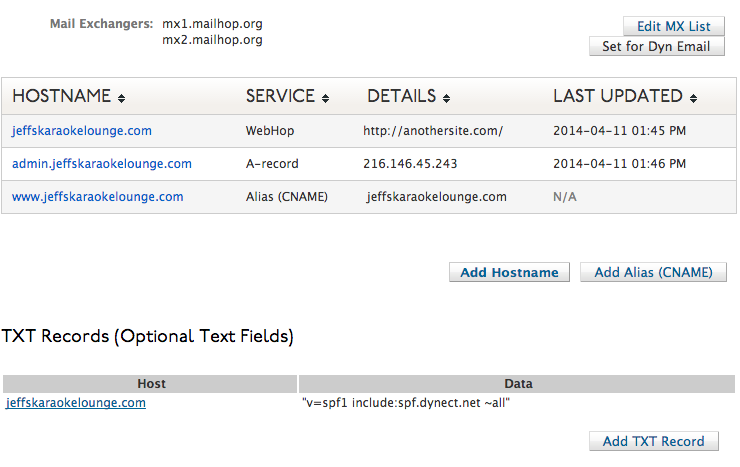
3. The four record types that are available in the Standard Interface are A, CNAME, TXT and MX.
|  |
| Your deletion will take effect on our servers shortly, but may not resolve as quickly because the record may be cached by local resolvers or subject to a TTL that has not yet expired. It will continue to resolve wherever cached until the cache expires. |
Deleting records in the Expert Interface
| 1. Log into your Dyn account and locate the My Services option. | |
| 2. Find the Zone you wish to add a record to, and click Dyn Standard DNS Service to the right of the zone's name. | |
| 3. Find the record you wish to remove. Click the check box to the right of the record to queue it for deletion. | 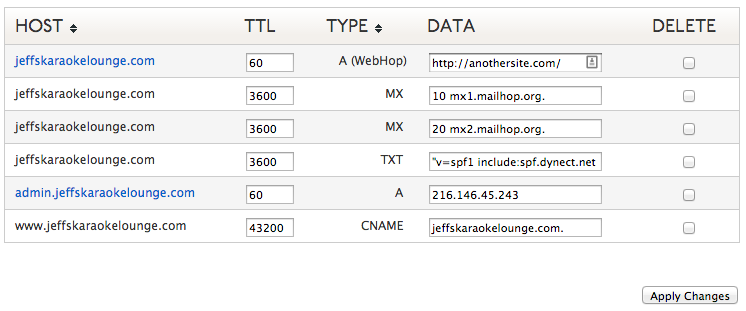 |
| 4. Click Apply Changes. Your deletion will take effect on our servers shortly, but may not resolve as quickly because the record may be cached by local resolvers or subject to a TTL that has not yet expired. It will continue to resolve wherever cached until the cache expires. |