In Managed DNS, users and contacts are separate entities. Managing a contact’s information is done through the Manage Contacts page.
Managing Zone Contacts »
Managing Users »
To Edit or Delete a Contact
| There are 2 ways to access the Manage Contacts view within the Managed DNS portal. |
| 1. The first way is to click Manage Account, and then click Manage Contacts within the Manage Account view. |


|
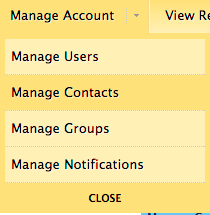
| 2. The second way to access the Manage Contacts view is to select Manage Contacts from the drop-down menu by selecting the arrow to the right of Manage Account on the menu bar. |
 |
| 3. Once you are on the Manage Contacts view, click the nickname of the contact to delete. Nicknames are shown in blue on the screen shot. They are linked to the contact’s individual information. |
 |
| 4. Click Delete to remove the contact from your account.
NOTE: If the Delete button is not visible, it means that the contact is still assigned to a service.
To determine which service(s) are assigned to the contact, run the Services Report (View Reports > Services Report), which lists all services on your account and all contacts assigned to each service.
Click Edit to open the contact information for editing. |
 |
« DNS Knowledge Base